Designing for Embroidery
Learn how to prepare logos and artwork for embroidery, including digitizing, file formats, stitch-friendly design, thread colors, sizing, placement, and common mistakes.
Embroidery Overview
Embroidery reproduces your design with stitched thread, so artwork must be prepared differently than it would be for printing. Bold shapes, solid fills, and simplified details generally produce the cleanest results.
Logo Preparation
Prepare your logo with embroidery in mind. Avoid fine lines, gradients, transparency, shadows, and glow effects. Designs should use clear shapes and a limited number of thread colors so they can be converted cleanly into stitches.
File Format & Digitizing
Vector files such as AI and SVG are preferred. Your artwork must be converted into a stitch-ready embroidery file before production. This process is called digitizing.
Stitch Density & Complexity
Highly detailed artwork can become difficult to reproduce clearly in thread. Simplify complex shapes and avoid very thin lines or small details that may lose definition when stitched.
Minimum Size Guidelines
Text should generally be at least 0.25" tall. Small type and intricate logo details may need to be simplified to remain readable when embroidered.
Color Selection
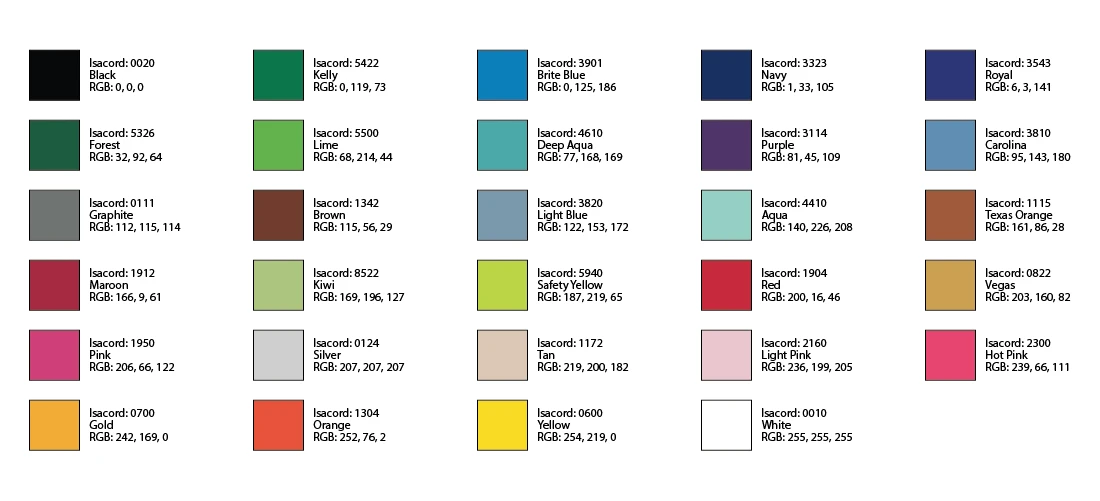
Embroidery uses physical thread colors rather than printed ink. Designs should generally be limited to 1–6 thread colors selected from the available embroidery palette.
Placement & Backing
Common embroidery placements include the left chest, front of a cap, center chest, and sleeves. Backing may be used to stabilize the fabric and support a clean stitchout.
Contrast & Texture
Strong contrast between thread and fabric can improve readability. Highly textured surfaces may make fine details harder to see.
Common Mistakes
- Using very small or overly detailed text
- Using too many thread colors
- Skipping digitizing
- Including excessive fine detail
- Expecting gradients, shadows, or glow effects to reproduce like printed artwork